To protect what you and your kids get up to online, it’s a good idea to set up parental controls on your Windows 10 device. From monitoring screen time to choosing apps and programs your child can use, you can learn all about it in our post. Read on to also discover what parental controls are available for Windows 10, how to set them up, and how Avira Free Security for Windows’ real-time protection makes your surfing experience even safer.
What are Windows 10’s parental control settings?
Parental controls on a digital system or online service protect minors from unsuitable content. To be effective, parents can customize various settings:
- Age restrictions: You can use age restrictions to determine which content, apps, and programs your kids can use. Doing so makes your child’s online adventures more age appropriate.
- Time limits: With Windows 10’s parental controls, you can set time limits for games and apps — an easy way to limit screen time.
- Monitoring: You can use parental controls on a Windows 10 device to monitor online activity. These include monitoring which websites and content your child accesses.
With the help of these features, you can keep track of your child’s surfing habits and ensure they’re more child friendly.
What are the benefits of parental controls on a computer?
So that your offspring can have child-safe access to the internet, it’s important to protect your computer with parental controls. In addition to content that is unsuitable for children, there are other dangers lurking on the World Wide Web. Cybercriminals often exploit children’s innocence, and in doing so gain access to devices. Once they have, they can spy on sensitive data or wreak other havoc. You can reduce this risk with parental controls for Windows 10. Other benefits include:
- Filter options: You can filter online searches to block adult content. If you want, you can create a list of websites, apps, or games that your child is allowed to access and use. Your child then won’t have access to any other content.
- Website monitoring: Don’t want to limit which websites your child visits but still want to keep track of them? Then Windows 10’s parental controls allow you to monitor which websites your kids visit.
- Time limits: Whether it’s for time spent playing a specific game or their overall screen time, you can set individual time limits. In doing so, you can specifically control how many hours your child spends on the Windows 10 device.
- Spend monitoring: A purchase can often be made with just a few clicks. To avoid unwanted bills, you can choose to require parental consent before your child can make an online purchase. With a Microsoft account balance, you can also limit how much your child spends online. This feature is ideal for older children such as teenagers.
It’s worth setting up parental controls on your device so that the whole family stays safer online. With the help of set screen times, your child will also learn to deal with the online world in a more balanced way. With Avira Secure Browser installed on your Windows 10 device, you benefit from additional protection that makes your and your kids’ surfing activities more anonymous.
Set up a child account for Windows 10’s parental controls
Want to create a safer online environment for your children and make it more child friendly? Prior to setting up parental controls on a Windows 10 device and turning on child monitoring, you’ll first need to add your child as a family member in your user account. Here’s how:
- Open the Settings app: In the Windows Start menu, open the Settings app and click Accounts.
- Add a family member: Select Family & other users. There you can add a family member with a single click.
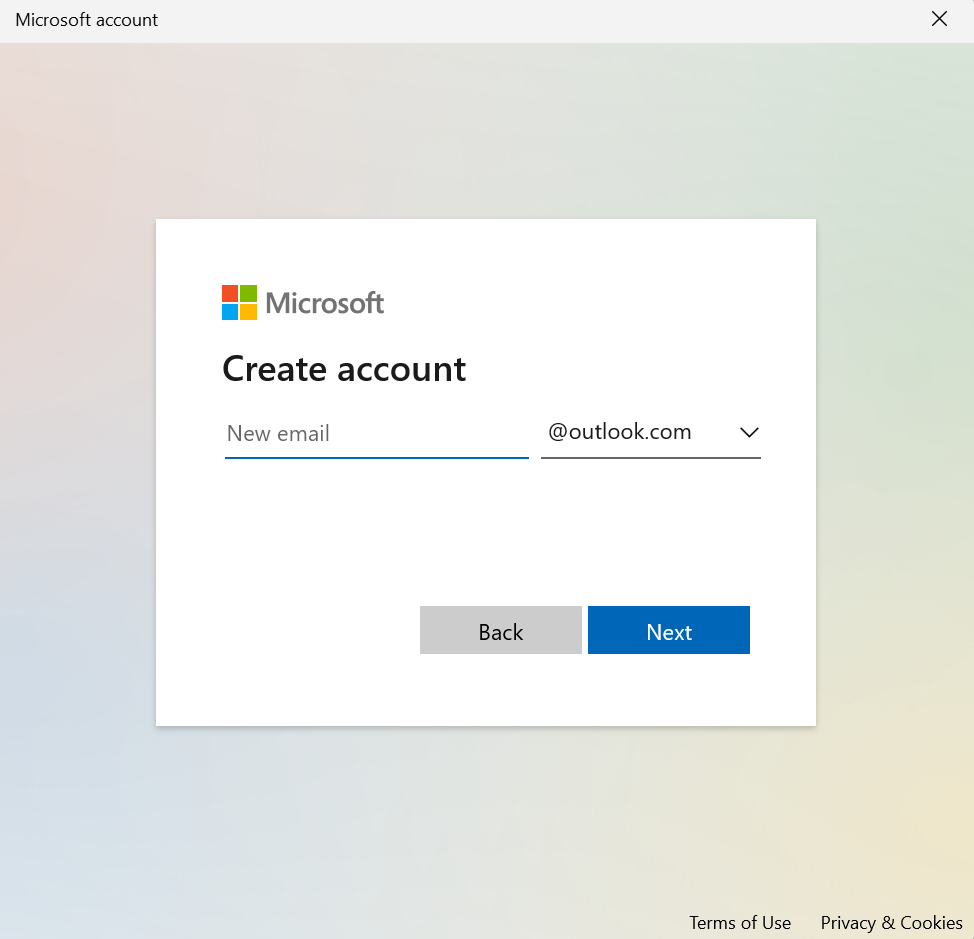
- Create a child Microsoft account: The next step is to create a Microsoft account for your child, otherwise you won’t be able to set up Windows 10’s parental controls. To create the child account, click Create one for a child.

- Enter email address: In the next field, enter a new email address for your child’s future Microsoft account.
- Create a password: You now need to create a password for your child’s account. You’ll then be asked to provide your child’s first and last name as well as your country and region. To protect minors, you should also enter your offspring’s date of birth.

- Confirm child Microsoft account: Now log in to your own Microsoft account. There you’ll be asked to agree to the creation of your child’s Microsoft account. After reading the terms and conditions, acknowledge them to give your consent.
- Connect device: You’ll then receive a confirmation email asking you to connect your child’s device to the account. The email will include a Connect a device button — click it. Also add other devices, if necessary. This allows you to additionally make Android devices more childproof.
How to set up parental controls on a Windows 10 computer
Once you’ve created a child account for your children, you can set up parental controls on your Windows 10 device. To do so, follow our step-by-step instructions:
- Manage child account: In the Settings app, open Family & other users and click Manage family settings online.
- Call up the settings overview: Now you’ll see tiles with each family member’s name on them. Click the three vertical dots on the top right of your child’s tile and select Go to overview. There you’ll see all the options for Windows 10’s parental controls.

- Add devices: The next step is to add all of your child’s devices — such as a laptop or smartphone — to apply parental controls on all devices.
Next you’ll learn how to personalize Windows 10’s parental controls — from screen time to spending limits.
How to set screen time on a Windows 10 device
Want to set how long your child can use a Windows 10 device each day? Then set screen-time limits. Here’s how:
- Open Screen time: Click Screen time in your child’s account overview.
- Set time limits: In this area, you can set time limits for each day of the week. You can also set at what time of day your child can use the device. To do this, select the day and the desired time limit, and confirm your settings by clicking Done.
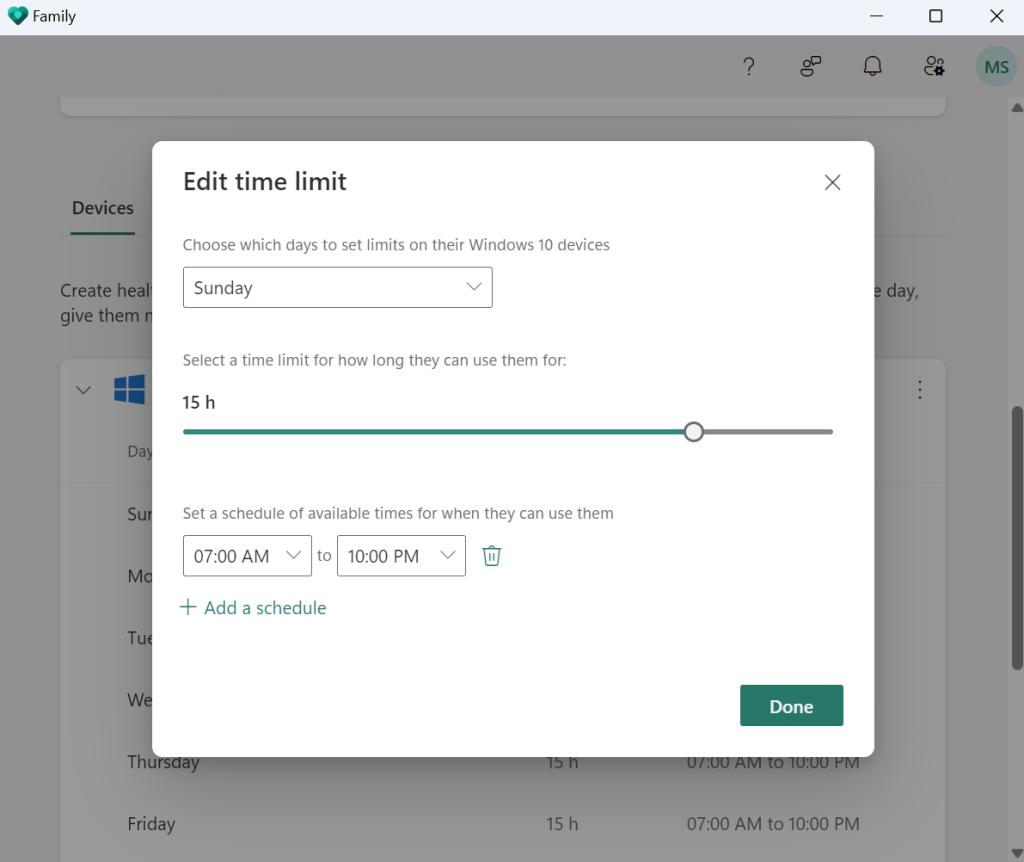
- Set a schedule: If you want to set when the device is available, set a schedule. In this you set the times at which your kids can use the device. Confirm your selection again by clicking Done. You can apply the schedule to all your child’s devices.

Windows 10’s parental controls: How to set time limits for apps and games
If you want to limit the use of certain apps or games, you can also set time limits for individual programs. You can do this in just a few steps:
- Open Screen time: As with setting the screen time, first open your child’s account overview and click Screen time. Then select the Apps and games tab.
- Select app: Click the app for which you want to set a time limit and set it. Alternatively, you can block apps entirely by selecting Block app. It’s a good move to do so for apps like Telegram or other messaging apps as they can be potentially dangerous for children.
- Customize time limit: Select the days you want to restrict the app or game. You can also set how many hours and during what period your child can use the app. Confirm your settings by clicking Done.
Set up content filters and website blockers to make the online environment more child friendly
If you want to prevent your offspring from coming across inappropriate online content that’s harmful to minors, it’s worth setting up a content filter. To do that, follow these simple steps:
- Open Content filters: You can create one in the Content filters section of your child’s account overview.
- Customize filters: Scroll to the filter settings and toggle the Filter inappropriate websites and searches slider to On.
- Block websites: If you want to prevent your child from accessing certain websites, you can block them completely. To do this, enter the desired URLs under Blocked sites and add them by clicking the plus sign.
By the way: Alternatively, you can also specify which websites you only want your kids to access — all others will then be blocked. To do this, enter the desired URLs that your child can visit under Allowed sites.
Parental controls for Xbox Live: Here’s how to set up this feature in Windows 10
In addition to websites, you can also restrict your child’s online gaming activities. For example, Windows 10’s parental controls give you the option to limit Xbox Live playtime. If you add an Xbox console, the time-limit settings you’ve already set up will be applied. Here’s how to add a console:
- Open child account overview: Go to the overview of your child’s Microsoft account and select How to connect more devices.
- Select Xbox consoles: Click Xbox consoles.

- Add device: Follow the instructions to also set up Windows 10’s parental controls on your Xbox.

How to limit your child’s online spending
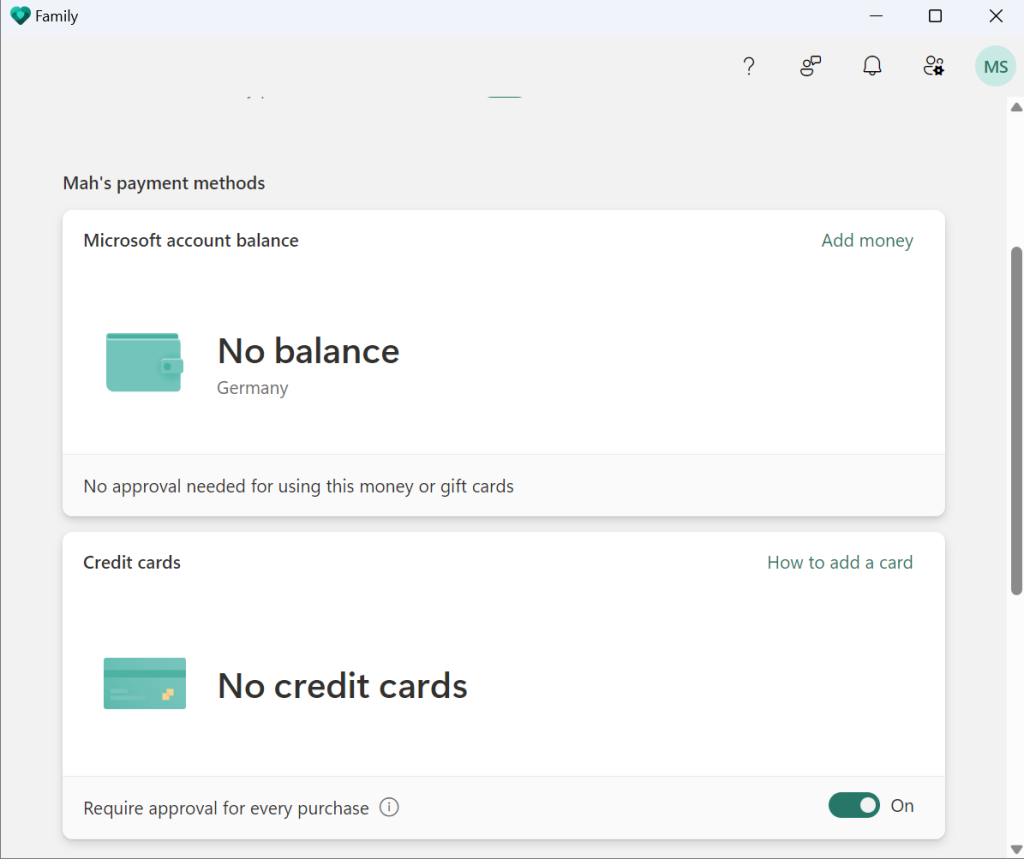
With Windows 10’s parental controls, you can also restrict your kid’s spending on the internet. The easiest way is to not link your credit card to your child’s account so your offspring doesn’t have access to your bank account. However, if you want to link your credit card to the account, we recommend setting up an approval function using Windows 10’s parental controls. You’ll then need to authorize each purchase in your Microsoft account before it’s approved.
Alternatively, you can deposit pocket money into your child’s account. You then decide how much money your child has at their disposal. This money can be spent as they wish — without you having to authorize every purchase. Once the spending limit is reached, no further purchases can be made. You set the limit in the Spending section of your child’s Microsoft account.
Complement Windows 10’s parental controls with additional solutions
Parental controls are a way to increase your children’s online safety. However, tests show that parental controls on PCs and smartphones are far from enough. It’s therefore worth supplementing the parental controls on your PC with antivirus software. Avira Free Security for Windows offers you real-time protection against ransomware, computer viruses, and other malware. If the tool detects malware, it blocks it — as well as potentially unwanted applications (PUAs) hidden in legitimate software — enabling you to make your and your child’s online activities safer.

Luis Corrons has been working in the security industry since last century, specifically in the antivirus field. He is the Security Evangelist for Gen (Avast, AVG, Avira, Norton). He is also WildList reporter, chairman of the Board of Directors of AMTSO (the Anti-Malware Testing Standards Organization) and a member of the Board of Directors of MUTE (Malicious URLs Tracking and Exchange). Luis loves public speaking and he has participated in top rated industry events like Virus Bulletin, HackInTheBox, APWG, AVAR, Security BSides, etc.