

You’re usually advised not to fake it in life, but using your iPhone or iPad to pretend you’re in a different location can open the door to new online freedom—while helping to shield your privacy. Explore our step-by-step guide to quickly and easily navigate the options in switching your location, from tinkering with your phone’s GPS settings to using a VPN. Avira Phantom VPN helps you feel like a secret agent as you hop anonymously around the virtual world. Ready to travel anywhere without leaving your seat?
Is it worth changing the location on your iPhone? The fabulous 4 benefits
Should you try and change your location? If you’re in England, enduring another wet summer, the answer seems obvious: Yes. You can’t be teleported around the world (yet?) but your iPhone can offer you the next best thing: another (virtual) location. It turns out that faking it really does come with a world of greater freedom and many benefits! Changing the real, current location on your mobile device can help you:
- Enhance your privacy: Apps and websites track your location and web activities to target you with ads and harvest data for analytics. Masking or faking your location helps keep this data out of reach and your real whereabouts more private.
- Save money when online shopping: Some companies use dynamic or geographical pricing, so the costs of their products and services can vary depending on your location and even the make and model of your device! Looking for a cheap flight to Spain, for example? Spoofing your location could give you better deals on flights, hotels, and holiday shopping.
- Work remotely more safely: With an alternative digital location, you can more easily connect to company networks when abroad, help evade those trying to spy on you and work more safely from anywhere. That’s because a VPN offers an extra layer of security online that encrypts your browsing traffic. That’s particularly important if you use your own device for work, so won’t be connecting via the company VPN. Also, if your company’s security systems only allow access from within your home country, you can just pick a VPN server in another location and bypass the block to work productively from your new location.
- Use public Wi-Fi more securely: Who isn’t tempted to use free Wi-Fi as it beckons to you from an airport or coffee shop? Think twice! Public Wi-Fi can be dangerous without a VPN as it’s not usually encrypted, making it easier for hackers to access your data. They can then use your information to create targeted cyberattacks, phishing emails, and break into your online accounts.
“Is it legal to change the location on my iPhone and take advantage of these fantastic benefits?” we hope we hear you asking. That’s a vital question to consider before you start spoofing your digital whereabouts and leaping over geo boundaries. Changing your location isn’t illegal per se, but it can violate the terms of service of certain apps or websites. Always make sure you understand the rules of the platforms you’re using and comply with all applicable laws and regulations, wherever your location and whatever sites you’re using.
But hang on…how does your phone know where you are anyway? Thanks to something called ‘geolocation’, a smartphone can gather information from cellular, GPS, Wi-Fi networks, and Bluetooth connections. This opens a can of worms regarding the privacy of your data. Let’s explore.
How is your phone’s location being tracked—and what are the risks?
The moment you turn your smartphone on, it automatically connects to your provider’s network, regardless of whether you’re interacting with it or not. Even if you don’t make calls or send messages, your device regularly “checks in” with nearby cell towers. In less congested areas, GPS is more accurate. Your phone also repeatedly scans for Wi-Fi access points and if you’re in a crowded city, this is the most accurate pinpoint of your location.
So, we can agree that your smartphone’s location is relentlessly tracked—but what happens to this data? Like so much of the data collected online, it’s readily available to purchase for both legitimate (e.g.: marketing analytics) and less savoury reasons (think of the dark web). Third parties anonymise location data before re-selling it and data brokers even buy data directly from mobile carriers. (These data sets are compiled directly from the cell towers). Back in 2019, the Privacy Project by the New York Times reported on the movements of 12 million users using data purchased from location companies and declared that: “The boundaries of privacy are in dispute, and its future is in doubt”. Read up here on how to help stop your smartphone from leaking your location.
While there isn’t a single way to overcome all these tracking systems at once, altering your regional IP (Internet Protocol) address helps remove many blocks related to local app restrictions and data allowances. That’s because your IP address is the unique identifier for your device online. When a VPN masks it, you’re freed from the geographical constraints of your current location. Leap straight down to our VPN section now if you think this tool is for you or you’ll need to tinker with your phone settings.
Method 1: Use a VPN to change your iPhone location (and help shield your privacy)
Method 2: Change your GPS location
Method 3: Switch your Apple store region
Method 4: Turn off location services
Method 1: Use a VPN to change your iPhone location
A VPN is considered an excellent security tool! It’s possibly the fastest and easiest way to change your location on an iPhone or iPad—but that’s just one of the reasons you should be using one. By rerouting your data and web traffic through a remote server and secure private tunnel, it helps hide your real IP address and assigns you a new one. In this way, a VPN also helps shield your privacy online and can make your surfing more secure. It also encrypts your data to keep it away from the prying eyes of hackers and snoops.
Convinced? Here you go:
- Download a reputable VPN app, like free Avira Phantom VPN, from the App Store. It’s available for multiple operating systems and types of devices: VPN for PCs, VPN for Mac, VPN for Android and VPN for IoS. To free yourself from data limits, opt for the paid-for Avira Phantom VPN Pro, which also comes with premium customer support.

- Create an account once the app is installed and follow the prompts to sign up. Then sign in using your new credentials.

- Choose a country. Under “Selected location” you’ll see your current location. Click on this to open a full list of alternative countries and choose the location you want the VPN server to be in. Avira has servers worldwide.


- Establish a VPN connection by tapping the “Turn on VPN” button. Now your internet traffic will be routed through the server of the country you chose.

- Check that your VPN is functioning properly. Find out your IP address here and check it before and after connecting to the VPN server. When you compare both IP addresses, and they’re different, it means that—hooray—your VPN is working.

Warning! Even though it’s given you a new IP address, a VPN might still not be enough to change your iPhone’s location. Some apps look beyond the IP address to pinpoint where you really are and use your device’s GPS data or the settings of your Apple Store region. Busted! Navigation, social, or retail apps are the ones most likely to find out your current location. If you have this problem, your iPhone has a few tricks up its sleeve to help. It’s easy to turn off your iPhone’s GPS location services. The very determined can try the more arduous task of spoofing iPhone GPS data.
While we’re on the subject of surfing privately, you might want to consider incognito mode too, which means that your browsing history won’t be saved, and cookies deleted at the end of your session. It’s like using a browser with amnesia.
Method 2: Change your GPS location
Whether you want to gain access to location-specific content in apps or test out how they work in different regions, it’s quite simple to adjust the GPS location on your iPhone.
- Download a trusted third-party app. Popular apps include iTools, Dr.Fone, and iMyFone.
- Connect your iPhone to your computer via a USB cable. Unlock your iPhone and tap Trust This Computer if prompted.
- On your computer, launch the third-party app you installed in step 1.
- Find the Virtual Location feature (or feature with a similar name) in the menu and click on it.
- Enter your desired location. Enter the address or coordinates of the location or drop a pin on the map in the app.
- Confirm the changes. After selecting your desired location, confirm the changes to apply them. Your iPhone’s GPS should now show a new location.
Reminder: Only use official third-party apps you trust to be legitimate to change your GPS location. Doing so can affect how your other apps work. Always comply with app policies and local laws.
Method 3: Change your Apple store region on iPhone or iPad
If you want to install an app that’s unavailable where you are, you’ll need to change your Apple ID region first. Before you do, remember to spend your store credit, cancel your subscriptions, and choose a new payment method for your new region.
To change your Apple Store region, follow these steps on your iPhone:
- Go to Settings and click on your Apple ID profile.


- Go to Media & Purchases and select View Account. Sign in with your Apple ID password.
- Choose Country/Region and then Change Country or Region.
- Select a new country or region from the list. Review and agree to the terms and conditions.
- Tap Agree.
You can also use your computer to change your Apple Store region—no iPhone required:
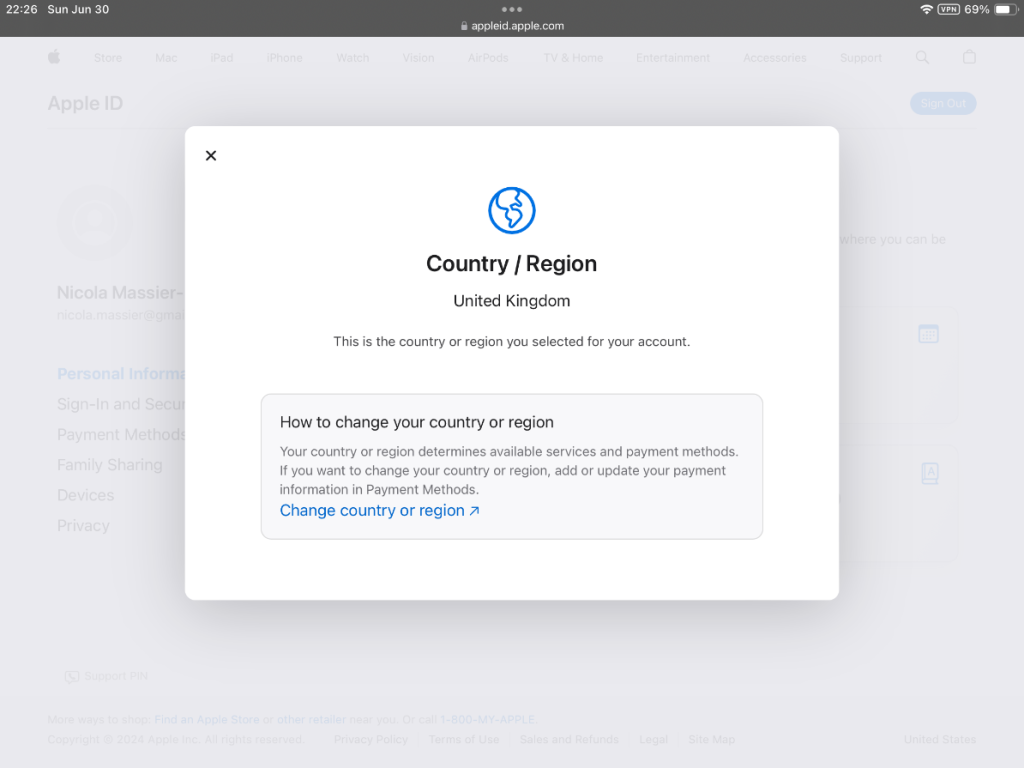
- Go to appleid.apple.com and sign into your account.
- Click Personal Information.
- Click Country/Region and then Change Country or Region to choose the region you want, plus a valid payment method.
Reminder: Changing your Apple Store region won’t change your GPS location. Geolocating apps will still know where you are.
What will changing my Apple ID region iPhone affect?
All actions have consequences, and this is no different. So, bear in mind that having your iPhone leap around the globe virtually will change many aspects of using it. You’ll only have access to the App Store in your new region and different laws and restrictions regarding digital content will apply there. Services like Apple Music and Apple TV+ might also be affected. Plus, previous purchases and subscriptions, like apps, books, and music might not transfer—and your existing payment methods may not be valid either. That’s a lot to consider! Only you’ll know if it’s worth it.
Reminder: Changing your Apple ID region is allowed, but it should always be done in compliance with Apple’s Terms of Service.
Disable Location Services
When you first set up your iPhone, you’re asked if you want to turn on Location Services. After that, you can turn Location Services on or off at any time. The first time an app wants location data from your iPhone, you’ll receive a request. Some apps make a one-time-only request for your location. Other apps will keep asking. You can choose whether to grant or deny apps access to your location and change your mind at any time. Follow the steps below to change your iPhone’s location settings in general or opt to switch settings off for a particular app only.
Change Location Services on your iPhone
Location-based apps use the location feature to track your device’s approximate location to offer location-based services. To turn it off, follow these steps:
- Go to Settings.
- Click on Privacy and Security.
- Select Location Services and turn them off.


Note: Some apps and features may not work with Location Services turned off.
Turn Location Services off for a specific app
You can decide at any time to change an app’s access to your location. Switching off Location Services for a specific app will block it from collecting your location information.
- Go to Settings.
- Tap on Privacy and Security. Here you can see which apps have access to certain information, which might include your location, contacts, photos, and more.

- Select the app you want to deny location access.
- Tap Never.

Can you fake your GPS location on an iPhone—and should you?
It is possible, but don’t expect help from the App Store as there isn’t an official spoofing aid. You’ll have to plug your iPhone into a desktop and buy third-party software that may be unreliable or even unsafe. Even iPhones are vulnerable to malware and some spoofer apps are simply Trojans in disguise. If you must download any app from beyond the safety of the App Store, make sure you have reputable online protection in place. Avira Mobile Security for iOS helps keep your operating system up to date and securely patched, can block phishing websites to help keep you safer online and even helps you recover a lost or stolen iPhone or iPad. And it comes with free VPN to help secure your connections, even on public Wi-Fi.
Some people even jailbreak their iPhones to install unauthorised apps. This isn’t recommended for a host of reasons: You might download unsafe, pirated apps, void the phone warranty and increase the risk of security vulnerabilities and data breaches. You have been warned…
The safer way to gain access to more content and protect your privacy: a VPN
A VPN, like Avira Phantom VPN for iOS (also available for Mac, PCs, and Android) helpfully grants you a new IP and masks your real location. Yet it does so much more. By encrypting your internet traffic and routing it though a private tunnel, it helps shield your data and communications, keeping them safer and more private. You can even connect to an unsecured network like public Wi-Fi. For a monthly or annual subscription plan, treat yourself to an upgrade and enjoy no data limits with Avira Phantom VPN Pro.